Hidden Tunes Via An Ipod
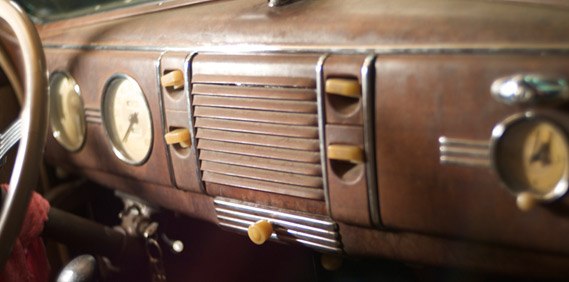
A few weeks ago, I mentioned that I was itching to get some tunes into my daily driven ’39 Ford Sedan. Installing a simple stereo in an old car is easy as pie, but this car presented a challenge of sorts. See, the ’39 still has the original interior and wood grained dash and come hell or high water, there was just no way I could talk myself into cutting anything on the car at all. Whatever I was gonna do, had to be completely hidden from sight and require zero hole drilling or cutting of any kind.
I decided right away that the smartest install would be an iPod/iPhone controlled system backed by a small amp and a single speaker located just behind the stock ’39 dash louvers. Easy enough, right? Here’s all of the equipment needed:
1. iPod Classic ($125 on eBay). I actually already had one sitting around, but they are easy enough to find on eBay for silly cheap money. Any iPod with a dock connector will do, including your iPhone.
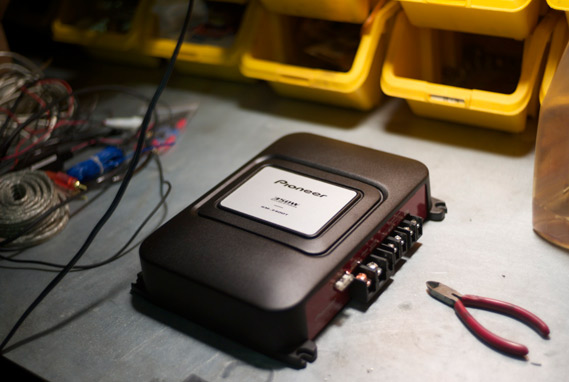
2. Pioneer GM3400 2-Channel Amp ($95). A good buddy of mine donated this unit to the project and it is probably overkill for this application. However, they are affordable and work well.
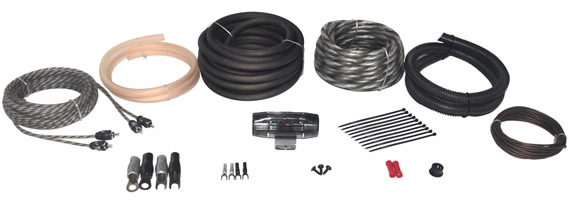
3. Rockford Fosgate Amp Install Kit ($25). You don’t really have to buy one of these kits, but they are handy as they come with all of the power wires, fuses, speaker cables, and RCA cables needed for installing an amp.
4. PAC IS75 ($24.99). This is a simple cable with RCA connections on one side and a iPod doc connector along with power and ground wires on the other side. This allows your iPod to charge while it’s playing music and gets you the added benefit of a cleaner signal than your headphone jack.
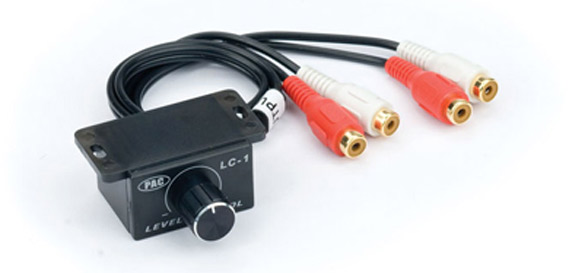
5. PAC LC-1 ($12.50). The one downside of using the PAC IS75 above is that when you connect your iPod via the dock connector, you lose the capability of controlling volume through the iPod. Typically, the PAC LC-1 is used to control sub levels on high-end systems. I found that it is also a great volume knob.
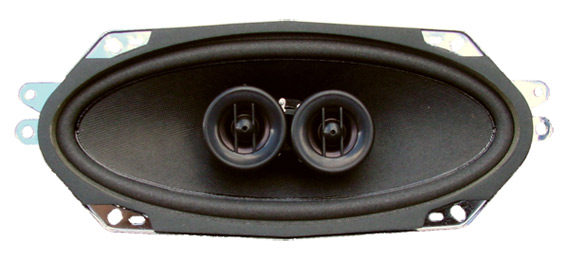
6. Custom Autosound DVC 5″x7″ Speaker ($49). I don’t know my ass from a hole in the ground when it comes to speakers, but I decided to give one of these a shot. They were designed to replace stock dash speakers in big 1950’s era cars and give you an almost stereo sound. In fact, it’s one speaker with a left and right channel… I guess that’s what “Dual Voice Coil” means.
The first task at hand is always the hardest for me – figuring the speaker location and mounting it securely. The 5×7″ speaker fit the stock ’39 radio opening pretty well. All I had to do was fabricate a simple bracket that utilized the stock ’39 radio holes for mounting. Once done, the speaker was out of site and I was ready to move on to the volume knob (PAC LC-1).
I kind of broke one of my rules here and drilled a hole. However, the hole was only drilled in an extra “radio delete” plate that I had laying around. Through that hole went my gutted LC-1 (as mentioned above, I removed the LC-1 from its casing and ditching the press fit knob) and on the LC-1’s shaft went a stock ’39 Ford window crank knob that I drilled to fit. The result is a volume knob that is easy to reach and doesn’t look out of place.
With the speaker and knob mounted, only the amp is left to locate. I decided to put the Pioneer under the seat on the passenger side. Rather than drill a bunch of holes in my floor plan, I just put some “no skid” pads on the bottom of the amp and set it under the seat. It’s not going anywhere…
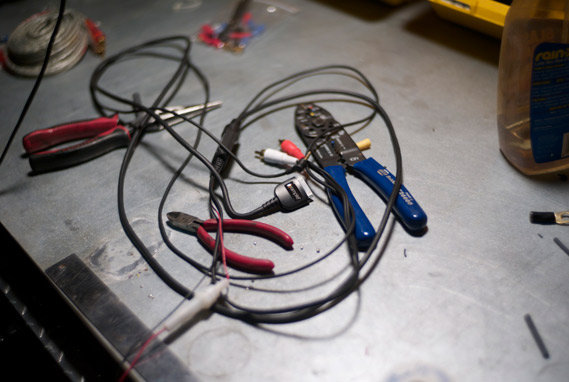
With the “hard” shit done, it was time to get out the wire and go to town. Wiring an iPod system like this couldn’t be more straight forward. If a hack like me can do it, you can to… So, don’t let your knees start to knocking. Take a deep breath and follow the diagram:
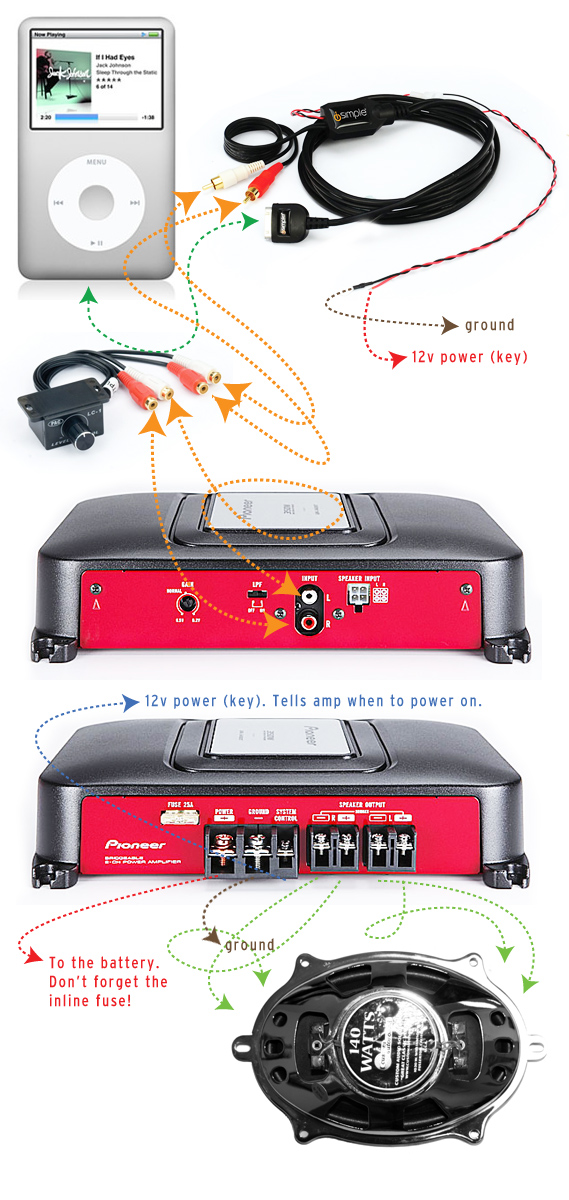
Easy, right? Even if you take your time and do proper soldered connections, this install shouldn’t take you more than an hour an half or so. I already had the speaker and volume knob mounted when I went out in the garage last night around 11pm. By midnight, I was sipping on Gin and Juice.
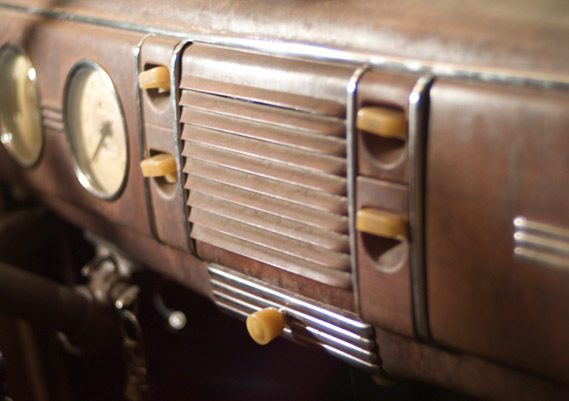
Surprisingly, the sound quality isn’t half bad. It’s immeasurably better sounding than a stock ’39 radio that I can’t afford, quite a bit better sounding than any stock 1960’s car stereo I’ve ever rocked, and almost as good as the last rental car stereo I blew up. For a single speaker, it really is quite impressive. And the best part? This is the only hint that the car has a stereo at all:

……………….